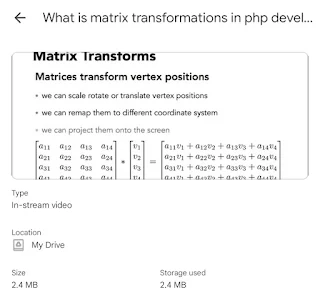
How to Hide elements on small screens during php programming.mp4


 To hide elements on small screens during PHP programming, you typically need to use CSS media queries rather than PHP itself. PHP runs on the server side and generates HTML, but the actual visibility of elements on the client side is controlled by CSS.

Here’s a basic approach to hide elements on small screens using CSS:

  1. Define CSS Classes for Visibility: Create CSS classes to control visibility based on screen size. For example:

    css
    .hide-on-small { display: block; /* Default display for larger screens */ } @media (max-width: 768px) { .hide-on-small { display: none; /* Hide on screens smaller than 768px */ } }
  2. Apply CSS Classes to HTML Elements: Use these classes in your HTML elements to control their visibility:

    html
    <div class="hide-on-small"> This content will be hidden on small screens. </div>
  3. Integrate with PHP: If you need to conditionally apply styles based on PHP logic, you can do so by adding classes or inline styles from PHP:

    php
    <?php $hideOnSmall = true; // Example condition ?> <div class="<?php echo $hideOnSmall ? 'hide-on-small' : ''; ?>"> This content is conditionally hidden on small screens. </div>
  4. Inline CSS (if necessary): For specific cases where CSS classes are not sufficient, you can use inline styles with PHP:

    php
    <?php $hideStyle = "display: none;"; // Example style for small screens ?> <div style="<?php echo $hideStyle; ?>"> This content is conditionally hidden on small screens. </div>

By combining PHP with CSS, you can effectively control the visibility of elements based on screen size. However, keep in mind that CSS media queries are generally the best tool for responsive design, as they handle layout and visibility adjustments directly in the browser.


Download now


Enjoy! Follow us for more... 

What is matrix transformations in php development.mp4


In PHP development, matrix transformations generally involve manipulating data in matrix form, often for tasks like graphics manipulation, data analysis, or complex calculations. PHP doesn’t have built-in support for matrix operations, so developers often use custom functions or libraries to handle these tasks.

For example:

  • Matrix Operations: Adding, subtracting, multiplying matrices, or finding determinants and inverses.
  • Image Processing: Using matrices to apply filters or transformations to images.
  • Data Analysis: Applying transformations for statistical or machine learning purposes.

Libraries like PHP Matrix or MathPHP can assist with these operations by providing functions for common matrix manipulations.


Download now
Enjoy! Follow us for more...

How to Cleaning up the code - Make a shader struct in php programming.mp4


In PHP, you generally don't write shaders or graphics-related code as you would in a language like GLSL or HLSL. However, if you're looking to create a structured way to manage shader-related data or configurations within a PHP application, you can use a class or struct-like approach to encapsulate shader properties.

Here’s how you might create a basic Shader class in PHP to manage shader-related data:

php
<?php class Shader { private $vertexShaderSource; private $fragmentShaderSource; private $uniforms; public function __construct($vertexShaderSource, $fragmentShaderSource) { $this->vertexShaderSource = $vertexShaderSource; $this->fragmentShaderSource = $fragmentShaderSource; $this->uniforms = []; } public function setUniform($name, $value) { $this->uniforms[$name] = $value; } public function getUniform($name) { return $this->uniforms[$name] ?? null; } public function getVertexShaderSource() { return $this->vertexShaderSource; } public function getFragmentShaderSource() { return $this->fragmentShaderSource; } public function compileShader() { // Placeholder method // In a real application, you'd use an appropriate library to compile shaders // For PHP, this could involve generating shader code files or configurations } } // Usage example $vertexShaderSource = 'vertex shader source code here'; $fragmentShaderSource = 'fragment shader source code here'; $shader = new Shader($vertexShaderSource, $fragmentShaderSource); $shader->setUniform('color', [1.0, 0.0, 0.0]); // Set uniform color to red echo $shader->getVertexShaderSource(); // Output vertex shader source ?>

Explanation:

  1. Properties: The class has private properties for the vertex and fragment shader sources and an array to hold uniform variables.
  2. Constructor: Initializes shader sources and prepares the uniforms array.
  3. Methods:
    • setUniform($name, $value): Sets a uniform variable.
    • getUniform($name): Retrieves a uniform variable.
    • getVertexShaderSource() and getFragmentShaderSource(): Return the shader source code.
    • compileShader(): A placeholder for compiling shaders (in practice, shader compilation would occur on the GPU or via a dedicated graphics library).

While PHP itself doesn’t interact with shaders directly (since shaders are typically handled by graphics APIs like OpenGL or WebGL), this class provides a structured way to manage shader data in a PHP application, especially if you are preparing shader code or configurations to be used by a web-based application or API.

Download now
Enjoy! Follow us for more... 
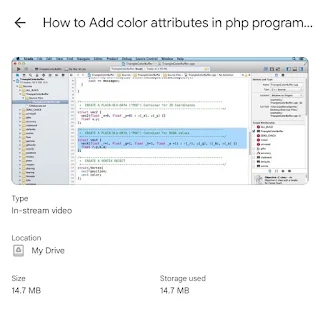

What is the OpenGL coordinate system.mp4


 The OpenGL coordinate system refers to the series of transformations that convert 3D object coordinates into a 2D image on the screen. Here’s a breakdown of how these coordinates are handled in OpenGL:


1. **Object Coordinates (Model Coordinates)**: These are the coordinates relative to the object's local origin. This system is used for defining the shape and structure of objects in a scene.


2. **World Coordinates**: This is the coordinate system of the entire scene. After applying model transformations (translation, rotation, and scaling), the object coordinates are transformed into world coordinates, placing the object within the larger scene.


3. **View Coordinates (Camera Coordinates)**: The view transformation converts world coordinates into view coordinates, which represent the scene from the camera’s perspective. This transformation accounts for the camera’s position and orientation.


4. **Clip Coordinates**: The projection transformation (either perspective or orthographic) converts view coordinates into clip coordinates. This step determines how the scene is projected onto a 2D plane, preparing it for the next stage.


5. **Normalized Device Coordinates (NDC)**: After clipping, the coordinates are transformed into NDC, where they are mapped to a normalized cube with coordinates ranging from -1 to 1 in each axis.


6. **Window Coordinates**: Finally, NDC coordinates are mapped to window or screen coordinates based on the viewport dimensions and resolution, where they are translated into pixel positions on the display.


Each transformation stage in this pipeline helps in rendering a 3D scene correctly on a 2D display by converting and normalizing the coordinates through a series of steps.


Download now

Enjoy! Follow us for more... 

What is Character ranges in php development.mp4


 In PHP development, "character ranges" typically refer to patterns or sets of characters defined for matching or processing strings. They are most commonly used in regular expressions and involve specifying a range of characters to match. Here’s a more detailed look at their usage:

1. Regular Expressions

In regular expressions, character ranges are used to define a set of characters that a particular pattern can match. They are enclosed in square brackets [ ]. For example:

  • [a-z]: Matches any lowercase letter from a to z.
  • [A-Z]: Matches any uppercase letter from A to Z.
  • [0-9]: Matches any digit from 0 to 9.
  • [a-zA-Z0-9]: Matches any alphanumeric character (both uppercase and lowercase letters and digits).

2. Character Encoding

Character ranges also relate to the character sets used in encoding schemes. In PHP, character encoding like UTF-8 supports a wide range of characters from various languages and symbols. This range is more about the characters supported by the encoding rather than a pattern for matching.

3. Usage in PHP Functions

PHP functions that deal with strings often use character ranges, especially when validating input or parsing strings. For instance:

  • preg_match(): This function uses regular expressions where you might use character ranges.
  • preg_replace(): Similar to preg_match(), this function allows you to replace text matching a pattern defined by character ranges.

Example

Here's a simple example using preg_match() to check if a string contains only letters and numbers:

php
$string = "Test123"; if (preg_match('/^[a-zA-Z0-9]+$/', $string)) { echo "Valid string"; } else { echo "Invalid string"; }

In this example, ^[a-zA-Z0-9]+$ is a regular expression where [a-zA-Z0-9] defines the character range that is allowed in the string.

Understanding character ranges is crucial for tasks such as input validation, data processing, and text manipulation in PHP.


Download now

Enjoy! Follow us for more... 

What is Negative character sets in php development.mp4


 In PHP development, "negative character sets" are typically used in regular expressions to exclude specific characters from a match. In regular expressions, a character set is defined by square brackets [ ], and a negative character set is specified by including a caret ^ at the beginning of the character set.

For example, if you want to match any character except for digits, you can use the regular expression:

php
$pattern = '/[^0-9]/';

In this pattern:

  • [^0-9] is a negative character set that matches any character that is not a digit.

This approach is useful for validating inputs or extracting specific data where you want to exclude certain characters from the matches.


Download now

Enjoy! Follow us for more... 

How to Add color attributes in php programming.mp4


 To add color attributes in PHP programming, you typically work with HTML or CSS. PHP itself does not directly handle colors but can generate HTML and CSS code that includes color attributes. Here’s a basic overview of how you might approach this:

Adding Color with PHP and HTML/CSS

  1. Generate Inline CSS with PHP: You can include color attributes directly in HTML elements by echoing CSS styles through PHP.

    php
    <?php $textColor = "#ff0000"; // Red color echo "<p style='color: $textColor;'>This is a colored text.</p>"; ?>
  2. Embed PHP Variables in a CSS File: If you want to use PHP to generate CSS dynamically, you can create a .php file that outputs CSS.

    style.php:

    php
    <?php header("Content-type: text/css; charset: UTF-8"); $backgroundColor = "#00ff00"; // Green color ?> body { background-color: <?php echo $backgroundColor; ?>; }

    Then, link to this CSS file in your HTML:

    html
    <link rel="stylesheet" type="text/css" href="style.php">
  3. Using PHP to Set Class Attributes: Generate class names or IDs with PHP and apply color styles in your CSS file.

    style.css:

    css
    .highlight { color: #0000ff; /* Blue color */ }

    index.php:

    php
    <?php $className = "highlight"; ?> <p class="<?php echo $className; ?>">This text will be highlighted.</p>

Summary

  • Use PHP to output color styles directly in HTML.
  • Create dynamic CSS files using PHP to generate styles based on variables.
  • Apply PHP-generated class names or IDs to elements and define colors in your CSS files.

These methods let you dynamically control the appearance of your web pages based on PHP logic.


Download now

Enjoy! Follow us for more... 

How to Detect errors in php program.mp4


To detect errors in a PHP program, you can follow these steps:

  1. Enable Error Reporting: Make sure error reporting is enabled in your PHP configuration. You can do this by adding the following lines to your PHP script or php.ini file:

    php
    error_reporting(E_ALL); ini_set('display_errors', 1);
  2. Check PHP Logs: Errors and warnings are logged in PHP's error log file. You can find the location of this file in your php.ini configuration under the error_log directive. Check this file for error messages.

  3. Use try-catch Blocks: For exceptions, use try-catch blocks to handle errors gracefully and display error messages.

    php
    try { // Code that may throw an exception } catch (Exception $e) { echo 'Caught exception: ', $e->getMessage(), "\n"; }
  4. Debugging Tools: Utilize debugging tools like Xdebug, which allows you to set breakpoints and inspect variables to understand the flow of execution and errors.

  5. Check Syntax Errors: Syntax errors can be identified by running your PHP script through the command line with php -l yourscript.php. This command checks for syntax errors without executing the script.

  6. Use PHP Built-in Functions: Functions like var_dump(), print_r(), and error_get_last() can help you inspect variables and understand what might be going wrong.

  7. Review Code Carefully: Often, manual inspection of code logic and structure can help find errors. Look out for common issues like mismatched parentheses, missing semicolons, and incorrect variable names.

By applying these methods, you can effectively identify and resolve errors in your PHP program.


Download now


How to Incorporate enhanced controllers in php development.mp4


Incorporating enhanced controllers in PHP development involves adopting practices and techniques that improve the structure, functionality, and maintainability of your controllers. Here’s a step-by-step approach:

1. Adopt a Modern PHP Framework

  • Choose a Framework: Modern frameworks like Laravel, Symfony, or Zend Framework provide built-in support for advanced controller functionalities and best practices.
  • Leverage Framework Features: Utilize features such as routing, middleware, and dependency injection provided by the framework.

2. Define a Robust Controller Structure

  • Single Responsibility Principle: Ensure each controller handles a single responsibility, such as user management or product operations.
  • Action Methods: Define clear action methods in your controller to handle different HTTP requests (e.g., index, show, store, update, destroy).

3. Utilize Dependency Injection

  • Service Injection: Inject services or components directly into the controller's constructor rather than instantiating them within the controller. This improves testability and reduces coupling.
  • Configuration: Use the framework's dependency injection container to manage service lifecycles and configurations.

4. Implement Middleware

  • Pre-Processing: Use middleware to handle tasks such as authentication, logging, or request modification before reaching the controller.
  • Post-Processing: Apply middleware to modify the response or handle errors after the controller has processed the request.

5. Enhance Request Handling

  • Validation: Perform validation of incoming data using form request classes or validation rules provided by the framework.
  • Sanitization: Ensure data is sanitized to prevent injection attacks and maintain data integrity.

6. Manage Responses Effectively

  • Views and Templates: Render views using the framework’s templating engine. Keep the presentation logic separate from business logic.
  • API Responses: For APIs, use standardized JSON responses and handle different HTTP status codes appropriately.

7. Error Handling and Logging

  • Exception Handling: Implement proper exception handling within controllers to manage errors gracefully and provide meaningful feedback.
  • Logging: Utilize logging facilities to track and debug issues effectively.

8. Testing

  • Unit Testing: Write unit tests for controller methods to verify they work as expected in isolation.
  • Integration Testing: Test the controller in conjunction with other components (like the database or external APIs) to ensure end-to-end functionality.

9. Follow Best Practices

  • RESTful Design: If building an API, follow RESTful principles to create intuitive and standardized endpoints.
  • Code Quality: Adhere to coding standards and maintain a clean, readable codebase. Use tools like PHP_CodeSniffer or PHPStan for code quality checks.

Example Using Laravel

Here’s a basic example of an enhanced controller in Laravel:

php
namespace App\Http\Controllers; use App\Services\UserService; use Illuminate\Http\Request; use Illuminate\Http\Response; class UserController extends Controller { protected $userService; public function __construct(UserService $userService) { $this->userService = $userService; } public function index(): Response { $users = $this->userService->getAllUsers(); return response()->json($users); } public function show(int $id): Response { $user = $this->userService->getUserById($id); if (!$user) { return response()->json(['message' => 'User not found'], 404); } return response()->json($user); } public function store(Request $request): Response { $validatedData = $request->validate([ 'name' => 'required|string|max:255', 'email' => 'required|string|email|max:255', ]); $user = $this->userService->createUser($validatedData); return response()->json($user, 201); } }

In this example:

  • Dependency Injection: UserService is injected into the controller, promoting separation of concerns.
  • Validation: Request data is validated before processing.
  • JSON Responses: The responses are formatted as JSON for consistency, particularly in API contexts.

By incorporating these practices, you can build controllers that are more maintainable, testable, and aligned with modern PHP development standards.


Download now

Enjoy! Follow us for more... 

How to Repeating and nesting alternations in php development.mp4


 In PHP development, repeating and nesting alternations typically refer to using loops and conditional statements effectively. Here’s a basic overview of how you can achieve this:

Repeating Alternations (Loops):

  1. For Loop:

    php
    for ($i = 0; $i < 5; $i++) { // Code to repeat goes here echo "Iteration: $i <br>"; }

    This loop will execute the code inside its block ({}) a specified number of times (5 in this case).

  2. While Loop:

    php
    $i = 0; while ($i < 5) { // Code to repeat goes here echo "Iteration: $i <br>"; $i++; }

    This loop will continue executing the code inside its block as long as the condition ($i < 5) is true.

  3. Foreach Loop (for arrays):

    php
    $numbers = [1, 2, 3, 4, 5]; foreach ($numbers as $number) { // Code to repeat goes here echo "Number: $number <br>"; }

    This loop iterates over each element in an array ($numbers in this case) and executes the code inside its block for each element.

Nesting Alternations (Nested Loops and Conditionals):

  1. Nested Loops:

    php
    for ($i = 0; $i < 3; $i++) { echo "Outer loop iteration: $i <br>"; for ($j = 0; $j < 2; $j++) { echo "&nbsp;&nbsp;Inner loop iteration: $j <br>"; } }

    In this example, an inner loop is nested within an outer loop. Each iteration of the outer loop triggers several iterations of the inner loop.

  2. Conditional Statements (if-else):

    php
    $x = 10; if ($x > 5) { echo "$x is greater than 5 <br>"; } else { echo "$x is not greater than 5 <br>"; }

    Conditional statements allow you to execute different blocks of code based on conditions ($x > 5 in this case).

  3. Nested Conditionals:

    php
    $x = 10; $y = 5; if ($x > $y) { if ($y > 0) { echo "$x is greater than $y and $y is positive <br>"; } else { echo "$x is greater than $y but $y is not positive <br>"; } } else { echo "$x is not greater than $y <br>"; }

    This example shows nested if-else statements, where the inner condition ($y > 0) is evaluated only if the outer condition ($x > $y) is true.

Practical Tips:

  • Indentation: Maintain proper indentation to visually distinguish nested blocks.
  • Debugging: Use var_dump() or echo statements to check values during development.
  • Avoid Over-Nesting: Excessive nesting can make code harder to read and maintain; consider refactoring if nesting becomes too deep.

By mastering these concepts and practicing them, you'll be able to efficiently manage repeating tasks and complex decision-making in PHP development.


Download now

Enjoy! Follow us for more... 

What is Negative lookahead assertions in php development.mp4


In PHP development, especially when working with regular expressions, negative lookahead assertions are used to ensure that a specific pattern does not appear at a given position in the text being processed.

A negative lookahead assertion is written as (?!...), where ... represents the pattern you want to ensure is not present. This assertion allows you to perform pattern matching while excluding certain unwanted sequences.

Example

Suppose you want to match the word "apple" only if it is not followed by the word "pie". You could use the following regular expression:

php
/(apple)(?!\s+pie)/

Here’s how it works:

  • apple is the pattern you want to match.
  • (?!\s+pie) is the negative lookahead assertion that ensures "apple" is not immediately followed by " pie".

PHP Example

Here's a PHP snippet demonstrating negative lookahead in action:

php
<?php $pattern = '/apple(?!\s+pie)/'; $text = 'I like apple and apple pie.'; preg_match_all($pattern, $text, $matches); print_r($matches[0]); // Outputs: Array ( [0] => apple ) ?>

In this example:

  • preg_match_all finds all occurrences of "apple" that are not followed by " pie".
  • The result will include only the first "apple", and exclude the "apple" followed by " pie".

Negative lookahead assertions are powerful for complex text processing where specific patterns need to be excluded.


Download now

Enjoy! Follow us for more... 

How to Download and install the Windows Phone tools.mp4


To download and install Windows Phone tools, follow these steps:


1. **Download the Tools**:

   - Visit the [Microsoft Visual Studio website](https://visualstudio.microsoft.com/) or the [Windows Phone developer site](https://developer.microsoft.com/en-us/windows) to find the Windows Phone SDK or tools.

   - Look for the version of the SDK or tools compatible with your version of Windows. Note that Windows Phone SDK 8.1 and Visual Studio 2015 are popular versions.


2. **Install the Tools**:

   - Once downloaded, run the installer executable (.exe file).

   - Follow the on-screen instructions. This typically involves accepting the license terms and choosing installation options.

   - If you’re installing a Visual Studio version, the installer will guide you through setting up the IDE with Windows Phone development features.


3. **Set Up Your Environment**:

   - After installation, you might need to configure your development environment. This could involve setting up emulators, configuring device settings, or linking to your Microsoft account.


4. **Verify Installation**:

   - Open Visual Studio and create a new project to verify that Windows Phone development tools are properly integrated.

   - Ensure you can select Windows Phone templates and deploy applications to an emulator or device.


Keep in mind that support for Windows Phone has been phased out, so finding and using these tools may be challenging, and they might not be actively maintained.


Download now

Enjoy! Follow us for more... 

How to use the View matrix in xCode .mp4


In Xcode, working with a "View matrix" typically involves handling the view's transformation in a graphical or user interface context. If you’re dealing with matrices in a graphics or game development context, you might be working with a 3D graphics framework like SceneKit or Metal. Here’s a general guide for common scenarios:

SceneKit (3D Graphics)

In SceneKit, you manipulate the view matrix indirectly by setting properties on nodes or the camera:

  1. Setup SceneKit Scene:

    • Create a SCNScene and assign it to an SCNView.
    • Add nodes, lights, and cameras to the scene.
  2. Transform Nodes:

    • Use the transform property on SCNNode to apply matrix transformations (translation, rotation, scaling).
    swift
    let node = SCNNode() node.position = SCNVector3(x: 1, y: 2, z: 3) // Translation node.eulerAngles = SCNVector3(x: Float.pi / 2, y: 0, z: 0) // Rotation node.scale = SCNVector3(x: 1.5, y: 1.5, z: 1.5) // Scaling
  3. Camera Transformations:

    • Modify the camera property of a node to change the view.
    swift
    let camera = SCNCamera() camera.zFar = 1000 let cameraNode = SCNNode() cameraNode.camera = camera scene.rootNode.addChildNode(cameraNode)

Metal (Low-Level Graphics API)

In Metal, you handle matrices explicitly when creating transformation matrices:

  1. Create a Matrix:

    • Define your matrix operations in Swift. For example, you can use simd types to handle matrices:
    swift
    import simd let viewMatrix = matrix_float4x4(lookAt: cameraPosition, target: targetPosition, up: upVector)
  2. Set the Matrix in a Shader:

    • Pass the matrix to your Metal shaders.
    swift
    renderEncoder.setVertexBytes(&viewMatrix, length: MemoryLayout<matrix_float4x4>.size, index: 0)
  3. Matrix Operations:

    • Use operations such as translation, rotation, and scaling to manipulate your matrices.
    swift
    let translation = matrix_float4x4(translation: float3(1, 0, 0)) let rotation = matrix_float4x4(rotationAround: float3(0, 1, 0), angle: Float.pi / 4) let scale = matrix_float4x4(scale: float3(1, 1, 1)) let transform = translation * rotation * scale

UIKit (2D UI Development)

In UIKit for iOS development, you can use transformations on UIView objects:

  1. Apply Transformations:

    swift
    view.transform = CGAffineTransform(rotationAngle: CGFloat.pi / 4) // Rotation view.transform = CGAffineTransform(translationX: 100, y: 50) // Translation view.transform = CGAffineTransform(scaleX: 2, y: 2) // Scaling
  2. Combine Transforms:

    swift
    let translation = CGAffineTransform(translationX: 100, y: 50) let rotation = CGAffineTransform(rotationAngle: CGFloat.pi / 4) let scale = CGAffineTransform(scaleX: 2, y: 2) view.transform = translation.concatenating(rotation).concatenating(scale)

Each framework or context in Xcode will have different methods for working with matrices, so choose the appropriate approach based on whether you’re working with 3D graphics, 2D UI, or low-level graphics programming.


Download now

Enjoy , Follow us for more... 

How to connect to an FTP server from Linux?

To connect to an FTP server from a Linux system, you can use either a command-line FTP client or a graphical one. Here’s how to do it usin...