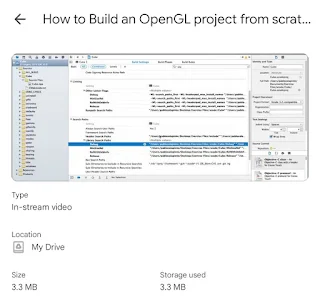
Adding texture coordinates to a 3D model in C++ with Xcode typically involves several steps. These steps assume you're working with a basic OpenGL setup and have a basic understanding of 3D graphics programming. Here's a simplified guide:
1. Setup Your Development Environment
Make sure you have Xcode installed and set up for C++ and OpenGL development. Create a new project or open an existing one where you plan to implement texture coordinates.
2. Define Your Vertex and Texture Coordinate Data
You'll need to define your vertex data and texture coordinate data. A typical vertex structure might look like this:
struct Vertex {
glm::vec3 position;
glm::vec2 texCoords;
};
3. Create and Populate Your Buffers
In your code, you will need to create a vertex buffer and a texture coordinate buffer. Here’s an example using OpenGL:
Vertex vertices[] = {
{ glm::vec3(-0.5f, -0.5f, 0.0f), glm::vec2(0.0f, 0.0f) },
{ glm::vec3( 0.5f, -0.5f, 0.0f), glm::vec2(1.0f, 0.0f) },
{ glm::vec3( 0.5f, 0.5f, 0.0f), glm::vec2(1.0f, 1.0f) },
{ glm::vec3(-0.5f, 0.5f, 0.0f), glm::vec2(0.0f, 1.0f) }
};
unsigned int VAO, VBO;
glGenVertexArrays(1, &VAO);
glGenBuffers(1, &VBO);
glBindVertexArray(VAO);
glBindBuffer(GL_ARRAY_BUFFER, VBO);
glBufferData(GL_ARRAY_BUFFER, sizeof(vertices), vertices, GL_STATIC_DRAW);
glVertexAttribPointer(0, 3, GL_FLOAT, GL_FALSE, sizeof(Vertex), (void*)offsetof(Vertex, position));
glEnableVertexAttribArray(0);
glVertexAttribPointer(1, 2, GL_FLOAT, GL_FALSE, sizeof(Vertex), (void*)offsetof(Vertex, texCoords));
glEnableVertexAttribArray(1);
glBindBuffer(GL_ARRAY_BUFFER, 0);
glBindVertexArray(0);
4. Load and Bind Your Texture
You’ll need to load a texture and bind it to a texture unit. Here’s an example using the stb_image library for texture loading:
int width, height, nrChannels;
unsigned char *data = stbi_load("path/to/texture.jpg", &width, &height, &nrChannels, 0);
unsigned int texture;
glGenTextures(1, &texture);
glBindTexture(GL_TEXTURE_2D, texture);
glTexImage2D(GL_TEXTURE_2D, 0, GL_RGB, width, height, 0, GL_RGB, GL_UNSIGNED_BYTE, data);
glGenerateMipmap(GL_TEXTURE_2D);
stbi_image_free(data);
5. Modify Your Shader Programs
Make sure your vertex shader and fragment shader are set up to handle texture coordinates. A simple example vertex shader might look like this:
#version 330 core
layout(location = 0) in vec3 aPos;
layout(location = 1) in vec2 aTexCoord;
out vec2 TexCoord;
uniform mat4 model;
uniform mat4 view;
uniform mat4 projection;
void main() {
gl_Position = projection * view * model * vec4(aPos, 1.0);
TexCoord = aTexCoord;
}
And a fragment shader:
#version 330 core
out vec4 FragColor;
in vec2 TexCoord;
uniform sampler2D texture1;
void main() {
FragColor = texture(texture1, TexCoord);
}
6. Render the Object
Finally, bind the texture and VAO, then draw the object:
glUseProgram(shaderProgram);
glBindTexture(GL_TEXTURE_2D, texture);
glBindVertexArray(VAO);
glDrawArrays(GL_TRIANGLES, 0, 6);
7. Compile and Run
Build your project in Xcode and run it. If everything is set up correctly, you should see the texture applied to your 3D model.
Troubleshooting
- Ensure that your paths for texture files are correct.
- Make sure your shaders are compiling without errors.
- Check for OpenGL errors using
glGetError() for debugging.
This guide assumes you're using basic OpenGL. If you're using a more advanced framework or library, such as GLFW or SDL, some steps might differ.


