How to make Hash objects with $H() function in JavaScript.mp4


 In JavaScript, you can create hash-like objects using the $H() function, which is commonly associated with the Prototype.js framework. However, if you're looking to create hash objects in standard JavaScript without any libraries, you can simply use plain objects or Map. Here's how to do both:

Using Plain Objects

You can use a standard object to create a hash:

javascript
const hash = {}; hash['key1'] = 'value1'; hash['key2'] = 'value2'; console.log(hash['key1']); // Output: value1

Using Map

If you want more advanced functionality, like preserving insertion order or allowing any type of key, you can use Map:

javascript
const hashMap = new Map(); hashMap.set('key1', 'value1'); hashMap.set('key2', 'value2'); console.log(hashMap.get('key1')); // Output: value1

If You Want to Use Prototype.js

If you specifically want to use the $H() function from Prototype.js, you can do it like this:

javascript
// Assuming Prototype.js is loaded const hash = $H({ key1: 'value1', key2: 'value2' }); console.log(hash.get('key1')); // Output: value1

Conclusion

For modern JavaScript development, using plain objects or Map is typically sufficient and recommended unless you have a specific reason to use Prototype.js.


Download now

Enjoy! Follow us for more... 

How to Limit data returned in Salesforce using workbench? .mp4


To limit data returned in Salesforce using Workbench, follow these steps:

  1. Log into Workbench: Go to the Workbench website and log in with your Salesforce credentials.

  2. Select SOQL Query: Navigate to "Queries" in the top menu and select "SOQL Query."

  3. Enter Your Query: In the query editor, input your SOQL query. To limit the data returned, use the LIMIT clause at the end of your query. For example:

    sql
    SELECT Id, Name FROM Account LIMIT 10
  4. Execute the Query: Click the "Query" button to execute your SOQL query.

  5. Review the Results: The results will be displayed, limited to the number of records you specified.

You can also use OFFSET to skip a certain number of records, for example:

sql
SELECT Id, Name FROM Account LIMIT 10 OFFSET 5

This retrieves records starting from the 6th record up to the next 10.


Download now

Enjoy! Follow us for more... 

What is Prototype's element class in JavaScript programming language? .mp4


In JavaScript, the Prototype library enhances the language's capabilities by introducing additional features for object-oriented programming. One of its key features is the Element class, which extends the built-in DOM elements.

The Element class in Prototype provides methods for:

  1. DOM Manipulation: Simplifies tasks like adding, removing, or modifying elements.
  2. Event Handling: Offers convenient methods for attaching and detaching event listeners.
  3. CSS Manipulation: Includes methods for manipulating CSS styles and classes.

Overall, the Element class is designed to make working with DOM elements easier and more efficient, enabling developers to write less code while achieving the same functionality.

If you want specific examples or details about its methods, let me know!


Download now

Enjoy! Follow us for more... 

How to get information about events using JavaScript Framework programming.mp4


 To get information about events using JavaScript frameworks, you typically follow these general steps:

1. Choose a Framework

Common frameworks include:

  • React
  • Vue.js
  • Angular

2. Set Up the Framework

Make sure you have the framework set up in your development environment.

3. Fetch Events Data

You can use an API to fetch event data. For example, you might use fetch in JavaScript or a library like Axios.

Example with Fetch:

javascript
fetch('https://api.example.com/events') .then(response => response.json()) .then(data => { console.log(data); // Handle the event data }) .catch(error => console.error('Error fetching events:', error));

4. Display Events

Use the framework's templating or rendering capabilities to display the event data.

Example in React:

javascript
import React, { useEffect, useState } from 'react'; const Events = () => { const [events, setEvents] = useState([]); useEffect(() => { fetch('https://api.example.com/events') .then(response => response.json()) .then(data => setEvents(data)) .catch(error => console.error('Error fetching events:', error)); }, []); return ( <ul> {events.map(event => ( <li key={event.id}>{event.name}</li> ))} </ul> ); }; export default Events;

5. Handle User Interactions

You can add event listeners to handle user interactions, like clicking on an event for more details.

6. Update State Dynamically

Use state management (like React's useState or Vue's data) to dynamically update the UI based on user actions or new data.

7. Optimize Performance

Consider performance optimizations, such as memoization in React or lazy loading in Vue, especially if dealing with large datasets.

Summary

The process involves choosing a framework, fetching event data via APIs, and displaying that data effectively while managing user interactions and state. Each framework has its specific methods and best practices for accomplishing this.


Download now

Enjoy! follow us for more... 

Practical Video about how to Displaying information dynamically in your HTML webpage.mp4


Displaying information dynamically on an HTML webpage typically involves using JavaScript to manipulate the Document Object Model (DOM). Here are some common methods to achieve this:

1. Using JavaScript

You can use JavaScript to change the content of HTML elements dynamically. Here’s a simple example:

html
<!DOCTYPE html> <html lang="en"> <head> <meta charset="UTF-8"> <meta name="viewport" content="width=device-width, initial-scale=1.0"> <title>Dynamic Content</title> </head> <body> <h1 id="dynamicHeader">Hello!</h1> <button onclick="changeContent()">Click Me</button> <script> function changeContent() { document.getElementById('dynamicHeader').innerText = 'Content Changed!'; } </script> </body> </html>

2. Using JSON and Fetch API

For dynamic data from an API, you can use the Fetch API:

html
<!DOCTYPE html> <html lang="en"> <head> <meta charset="UTF-8"> <meta name="viewport" content="width=device-width, initial-scale=1.0"> <title>Fetch API Example</title> </head> <body> <h1>Dynamic Data</h1> <div id="dataContainer"></div> <script> fetch('https://api.example.com/data') .then(response => response.json()) .then(data => { document.getElementById('dataContainer').innerText = JSON.stringify(data); }) .catch(error => console.error('Error fetching data:', error)); </script> </body> </html>

3. Using Frameworks

If you want more structured and powerful options, consider using frameworks like:

  • React: For building user interfaces with reusable components.
  • Vue.js: For reactive components with a simpler syntax.
  • Angular: For building complex single-page applications.

4. Using AJAX

For loading data asynchronously without refreshing the page, you can use AJAX:

html
<!DOCTYPE html> <html lang="en"> <head> <meta charset="UTF-8"> <meta name="viewport" content="width=device-width, initial-scale=1.0"> <title>AJAX Example</title> </head> <body> <h1>AJAX Data</h1> <button onclick="loadData()">Load Data</button> <div id="ajaxContainer"></div> <script> function loadData() { const xhr = new XMLHttpRequest(); xhr.open('GET', 'https://api.example.com/data', true); xhr.onload = function() { if (xhr.status === 200) { document.getElementById('ajaxContainer').innerText = xhr.responseText; } }; xhr.send(); } </script> </body> </html>

Conclusion

These methods will allow you to display information dynamically on your webpage. Depending on your needs, you can choose to use vanilla JavaScript or a framework to handle more complex interactions.


Download now

Enjoy,  Follow us for more... 

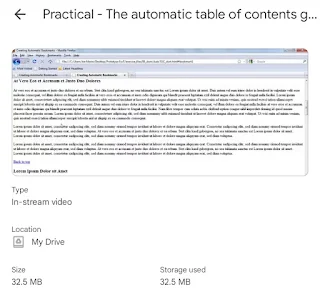
Practical - The automatic table of contents generator in html webpage


Creating an automatic table of contents (TOC) in an HTML webpage can be achieved using JavaScript. Here's a simple example:

HTML Structure

First, create the basic HTML structure with headings:

html
<!DOCTYPE html> <html lang="en"> <head> <meta charset="UTF-8"> <meta name="viewport" content="width=device-width, initial-scale=1.0"> <title>Automatic Table of Contents</title> <style> body { font-family: Arial, sans-serif; } #toc { margin-bottom: 20px; } #toc a { text-decoration: none; } h2, h3 { margin-top: 20px; } </style> </head> <body> <div id="toc"> <h2>Table of Contents</h2> <ul id="toc-list"></ul> </div> <h2>Introduction</h2> <p>This is the introduction section.</p> <h2>Chapter 1</h2> <p>Details about Chapter 1.</p> <h3>Subsection 1.1</h3> <p>Details about Subsection 1.1.</p> <h3>Subsection 1.2</h3> <p>Details about Subsection 1.2.</p> <h2>Chapter 2</h2> <p>Details about Chapter 2.</p> <script> document.addEventListener("DOMContentLoaded", function() { const tocList = document.getElementById('toc-list'); const headings = document.querySelectorAll('h2, h3'); headings.forEach(heading => { const listItem = document.createElement('li'); const anchor = document.createElement('a'); const id = heading.textContent.replace(/\s+/g, '-').toLowerCase(); heading.id = id; anchor.href = `#${id}`; anchor.textContent = heading.textContent; listItem.appendChild(anchor); tocList.appendChild(listItem); }); }); </script> </body> </html>

Explanation

  1. HTML Structure: The HTML includes various headings (h2 and h3) which will serve as the TOC items.
  2. CSS Styles: Basic styles for the TOC and headings.
  3. JavaScript:
    • It listens for the DOM content to load.
    • It selects all h2 and h3 headings.
    • It creates a list item for each heading, generates an ID based on the heading text, and appends it to the TOC.

How It Works

When the page loads, the script will generate a TOC based on the headings present in the document, allowing users to click and navigate directly to those sections.


Download now

Enjoy, follow us for more

What is the Prototype event class ? .mp4


The Prototype event class is part of the Prototype JavaScript framework, which was widely used to simplify JavaScript programming. The event class provides a way to handle and manage events in a consistent manner across different browsers.

Key Features:

  1. Event Object Creation: When an event occurs, the Prototype framework creates an event object that standardizes the properties and methods available for that event.

  2. Cross-Browser Compatibility: The Prototype event class abstracts away the differences between how various browsers handle events, making it easier for developers to write code that works across platforms.

  3. Event Handling Methods: It provides methods to attach and detach event listeners, allowing developers to respond to user interactions like clicks, key presses, and mouse movements.

  4. Event Properties: The event object includes useful properties, such as target (the element that triggered the event), relatedTarget, and stop() methods to prevent the default action.

Usage Example:

javascript
document.observe('click', function(event) { alert('Element clicked: ' + event.target.id); });

In this example, when any element on the document is clicked, an alert displays the ID of the clicked element.

While Prototype was popular in the early 2000s, its usage has declined with the rise of modern frameworks and native JavaScript enhancements.


Enjoy! Follow us for more... 


How to use Observe function in html webpage using Aptana .mp4


In Aptana Studio, the "Observe" function typically refers to the capability of watching changes in a DOM element or an attribute and reacting to those changes. This functionality is often associated with JavaScript libraries like Prototype.js, which provides convenient methods for observing changes.

Here’s a general approach to using the Observe function in an HTML webpage using Aptana (assuming you're using Prototype.js):

  1. Include Prototype.js: Make sure Prototype.js is included in your HTML file. You can download it and include it locally or link to a CDN version. For example:

    html
    <script src="https://ajax.googleapis.com/ajax/libs/prototype/1.7.3.0/prototype.js"></script>
  2. Write JavaScript Code: Use JavaScript to observe changes. Here’s a basic example:

    html
    <html> <head> <script src="https://ajax.googleapis.com/ajax/libs/prototype/1.7.3.0/prototype.js"></script> <script> document.observe('dom:loaded', function() { var element = $('myElement'); // Replace with your element ID element.observe('click', function() { alert('Element clicked!'); }); }); </script> </head> <body> <button id="myElement">Click me</button> </body> </html>
    • document.observe('dom:loaded', function() { ... });: This code waits for the DOM to be fully loaded before executing the JavaScript inside the function.
    • var element = $('myElement');: This selects the element with ID "myElement". $ is a shorthand in Prototype.js for document.getElementById.
    • element.observe('click', function() { ... });: This observes the 'click' event on the selected element and executes the function when the event occurs.
  3. Testing: Save your HTML file and open it in a web browser to test the functionality. Click the button (or trigger the event you're observing) to see the alert in action.

  4. Debugging: Use Aptana’s built-in debugging tools (like console logs and breakpoints) to troubleshoot any issues if your event observation is not working as expected.

This example demonstrates basic event observation using Prototype.js. Depending on your specific requirements, you can observe other events (e.g., 'change', 'mouseover') or observe attributes for changes (using observe on the element itself rather than on events). Adjust the JavaScript code accordingly to suit your needs and integrate it smoothly into your Aptana-developed HTML webpages.


Download now

Enjoy! Follow us for more... 

What is the StandardSetController in Salesforce.mp4


In Salesforce, the StandardSetController is a controller class provided by the platform that is used to manage a set of records in Visualforce pages. It simplifies the process of displaying and manipulating lists of records, particularly when dealing with large datasets. The StandardSetController allows developers to use pagination and standard operations such as creating, editing, and deleting records without having to write extensive code for record management.

Key Features of StandardSetController:

  1. Pagination: It helps in managing large sets of data by implementing pagination out of the box. This means you can efficiently navigate through records without loading them all at once.

  2. Sorting and Filtering: The controller provides built-in support for sorting and filtering the data, making it easier to display only relevant records.

  3. Standard CRUD Operations: The StandardSetController supports standard Create, Read, Update, and Delete operations. This reduces the need for custom code to perform these actions.

  4. Integration with Visualforce: It is typically used in conjunction with Visualforce pages, allowing for a seamless UI experience with Salesforce data.

  5. Dynamic Record Sets: You can create a set of records based on a SOQL query. The records can dynamically change based on user interactions or changes in the database.

Example Usage:

In a Visualforce page, you might use the StandardSetController like this:

<apex:page standardController="Account" recordSetVar="accounts" extensions="YourCustomExtension">
    <apex:pageBlock title="Accounts">
        <apex:pageBlockTable value="{!accounts}" var="acc">
            <apex:column value="{!acc.Name}" />
            <apex:column value="{!acc.Industry}" />
            <!-- More columns as needed -->
        </apex:pageBlockTable>
        <apex:commandButton value="Next" action="{!next}" />
        <apex:commandButton value="Previous" action="{!previous}" />
    </apex:pageBlock>
</apex:page>

In this example, the recordsSetVar is set to "accounts", referencing a list of Account records fetched using the standard controller.

Conclusion:

The StandardSetController is a powerful and flexible way in Salesforce to manage sets of records on Visualforce pages, making it easier for developers and users to work with data in a structured and efficient manner. It abstracts much of the complexity involved with pagination and data handling, allowing developers to focus on the logic of their applications.


Download now

Enjoy! Follow us for more... 
Working on supercomputers at Intel, did you give any thought to Moore's law.mp4


Yes, Moore's Law has been a significant consideration in the development of supercomputers at Intel. It predicts that the number of transistors on a chip will double approximately every two years, leading to increased performance and efficiency. This principle has guided advancements in semiconductor technology, influencing design decisions and encouraging innovation in parallel processing, energy efficiency, and overall system architecture. As we approach physical limits, exploring alternative technologies and architectures becomes increasingly important to continue performance improvements.


Download now

Enjoy! Follow us for more... 

What are the three top rules for successful user interaction design.mp4


 The three top rules for successful user interaction design are:

  1. User-Centered Design: Always prioritize the needs, preferences, and behaviors of the users. Conduct research and usability testing to understand how users interact with your product and iterate based on their feedback.

  2. Consistency: Ensure a cohesive experience across the interface. Consistent visual elements, terminology, and navigation help users feel more comfortable and reduce cognitive load, making it easier for them to learn and use the product.

  3. Clarity and Simplicity: Design interfaces that are intuitive and straightforward. Use clear language, concise labels, and straightforward layouts to minimize confusion, allowing users to achieve their goals efficiently.


Download now

Enjoy! Follow us for more...

How to create a new Flex project in flash builder.mp4


To create a new Flex project in Flash Builder, follow these steps:

  1. Open Flash Builder: Launch the Flash Builder IDE.

  2. Create a New Project:

    • Click on File in the menu bar.
    • Select New > Flex Project.
  3. Project Configuration:

    • In the dialog that appears, enter a Project Name.
    • Choose a location for the project files.
    • Select the Flex SDK version you want to use.
  4. Set Up the Application:

    • Choose the type of application you want to create (e.g., a "Mobile Flex Project" or "Web Flex Project").
    • Configure any additional settings as needed (like enabling support for certain features).
  5. Finish the Setup:

    • Click Finish to create the project. Flash Builder will set up the project structure.
  6. Build and Run:

    • You can start coding in the Main.mxml file or any other files created.
    • Use the toolbar to build and run your application.

Make sure you have the Flex SDK properly installed and configured for a smooth experience.


Download now

Enjoy! Follow us for more... 

How to Set up a Flex PHP project in Flash Builder.mp4


 Setting up a Flex PHP project in Flash Builder involves a few key steps. Here's a straightforward guide to help you get started:

Step 1: Install Flash Builder

  1. Download and Install: Ensure you have Adobe Flash Builder installed. It usually comes with the necessary SDKs.

Step 2: Create a New Project

  1. Open Flash Builder.
  2. Create New Project: Go to File > New > Flex Project.
  3. Project Name: Enter a name for your project and set the location.

Step 3: Set Up the PHP Backend

  1. Create a PHP File: In your project directory, create a folder for your PHP files (e.g., backend). Inside it, create a PHP file (e.g., api.php).
  2. Write PHP Code: Add the necessary PHP code to handle requests and return JSON data.

Step 4: Configure the Project

  1. Configure Flex SDK: Ensure the Flex SDK is set up correctly in the project settings.

  2. Add HTTPService: In your main Flex application (e.g., Main.mxml), add an HTTPService component to make requests to your PHP backend.

    xml
    <mx:HTTPService id="myService" url="http://localhost/path/to/backend/api.php" resultFormat="json" />

Step 5: Handle Data in Flex

  1. Make a Request: Use the send() method on your HTTPService instance to make a request to your PHP file.

  2. Handle Results: Add event listeners to handle the result and fault events.

    actionscript
    myService.addEventListener(ResultEvent.RESULT, onResult); myService.addEventListener(FaultEvent.FAULT, onFault); myService.send(); private function onResult(event:ResultEvent):void { // Process the data from the PHP response } private function onFault(event:FaultEvent):void { // Handle error }

Step 6: Test Your Application

  1. Run the Server: Make sure your PHP server (like XAMPP or MAMP) is running.
  2. Run Flex Project: Use Flash Builder to run your Flex application and test the connection to your PHP backend.

Step 7: Debugging

  • Use the console and logging features in Flash Builder to troubleshoot any issues.

Additional Tips

  • Ensure that your PHP scripts are accessible via the URL you specified in your HTTPService.
  • Consider CORS if your PHP server is on a different domain.

This setup will allow you to create a Flex application that communicates with a PHP backend.


Download now

Enjoy! Follow us for more... 

What is Prototype content functions in JavaScript Framework Programming.mp4

  Download now Enjoy! Follow us for more...